5.2. Agents, Groups and Roles
From open-support.info
(Difference between revisions)
| Line 9: | Line 9: | ||
<onlyinclude>__TOC__ | <onlyinclude>__TOC__ | ||
== Agents == | == Agents == | ||
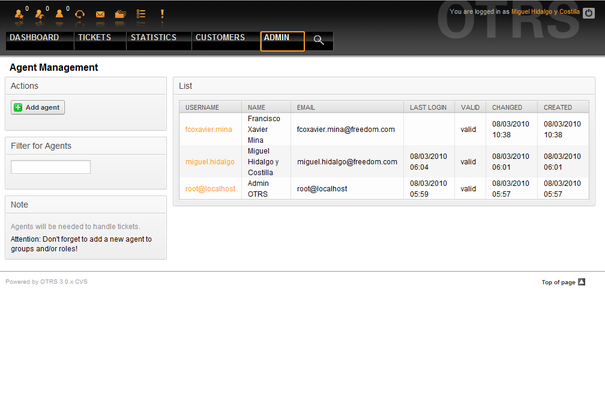
| - | + | By clicking the link Agents, you get access to the agent management screen of OTRS (see Figure 5.2 below). Administrators can add, change or deactivate agent accounts. Administrators can also manage agent preferences, for instance the language and notification settings for their interface. | |
| - | :{{Book/Link| | + | |
| - | + | {{fmbox | |
| + | |text= An OTRS agent account may be deactivated but not deleted. Deactivation is done by setting the Valid flag to invalid or invalid-temporarily. | ||
| + | }} | ||
| + | |||
| + | |||
| + | [[File:OTRS_3_0_-_Admin_Manual_Admin-agents.png|center|framed|Figure 5.2. Agent management.]] | ||
| + | |||
| + | |||
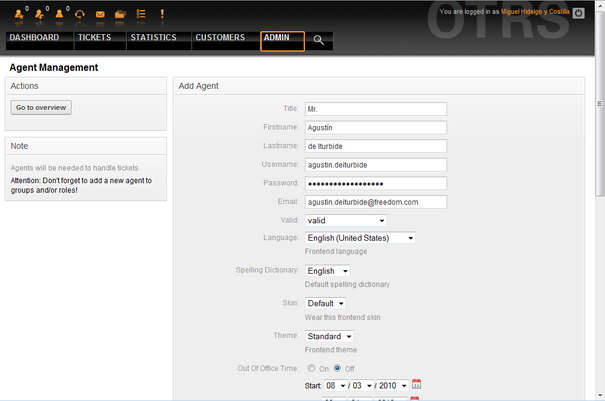
| + | To register an agent, click on the "Add agent" button, type all the needed data and press the Submit button at the bottom of the screen, as shown in Figure 5.3. | ||
| + | |||
| + | |||
| + | [[File:OTRS_3_0_-_Admin_Manual_Add-agent.png|center|framed|Figure 5.3. Adding a new agent.]] | ||
| + | |||
| + | |||
| + | After the new agent account has been created, you should make the agent a member of one or more groups or roles. Information about groups and roles is available in the {{Book/Link|../2|Groups}} and {{Book/Link|../3|Roles}} sections of this chapter. | ||
| + | |||
| + | == Groups == | ||
| + | |||
| + | == Roles ==</onlyinclude> | ||
Revision as of 18:30, 22 April 2011
Contents |
Agents
By clicking the link Agents, you get access to the agent management screen of OTRS (see Figure 5.2 below). Administrators can add, change or deactivate agent accounts. Administrators can also manage agent preferences, for instance the language and notification settings for their interface.
|
|
An OTRS agent account may be deactivated but not deleted. Deactivation is done by setting the Valid flag to invalid or invalid-temporarily. |
To register an agent, click on the "Add agent" button, type all the needed data and press the Submit button at the bottom of the screen, as shown in Figure 5.3.
After the new agent account has been created, you should make the agent a member of one or more groups or roles. Information about groups and roles is available in the Groups and Roles sections of this chapter.

