3.2. Installation from source (Linux, Unix)
From open-support.info
Contents |
Preparing the installation from source
If you want to install OTRS from source, first download the source archive as .tar.gz, .tar.bz2, or .zip file from http://www.otrs.org/downloads/.
Unpack the archive for example with tar into the directory /opt and rename the directory from otrs-3.0 to otrs (see Script 3.4 below).
linux:/opt# tar xf /tmp/otrs-3.0.tar.gz linux:/opt# mv otrs-3.0 otrs linux:/opt# ls otrs linux:/opt# |
| Script 3.4. Firsts steps to install OTRS. |
OTRS should NOT be run with root rights. You should add a new user for OTRS as the next step. The home directory of this new user should be /opt/otrs. If your web server is not running with the same user rights as the new 'otrs' user, which is the case on most systems, you have to add the new 'otrs' user to the group of the web server user (see Script 3.5 below).
linux:/opt# useradd -r -d /opt/otrs/ -c 'OTRS user' otrs linux:/opt# usermod -G nogroup otrs linux:/opt# |
| Script 3.5. Adding a new user and adding it to a group. |
Next, you have to copy some sample configuration files. The system will later use the copied files. The files are located in /opt/otrs/Kernel and /opt/otrs/Kernel/Config and have the suffix .dist (see Script 3.6 below).
linux:/opt# cd otrs/Kernel/ linux:/opt/otrs/Kernel# cp Config.pm.dist Config.pm linux:/opt/otrs/Kernel# cd Config linux:/opt/otrs/Kernel/Config# cp GenericAgent.pm.dist GenericAgent.pm |
| Script 3.6. Copying some sample files. |
The last step to prepare the installation of OTRS is to set the proper access rights for the files. You can use the script otrs.SetPermissions.pl, which is located in the bin directory, in the home directory of the 'otrs' user. You can execute the script with the following parameters:
-
otrs.SetPermissions.pl { Home directory of the OTRS user } { --otrs-user= OTRS user } { --web-user= Web server user } [ --otrs-group= Group of the OTRS user ] [ --web-group= Group of the web server user ]
If your web server is running with the same user rights as user 'otrs', the command to set the proper access rights is otrs.SetPermissions.pl /opt/otrs --otrs-user=otrs --web-user=otrs. On SUSE systems the web server is running with the user rights of 'wwwrun'. On Debian-based systems this is 'www-data'. You would use the command otrs.SetPermissions.pl /opt/otrs --otrs-user=otrs --web-user=wwwrun --otrs-group=nogroup --web-group=www to set the proper access rights.
Installation of Perl modules
OTRS needs some additional Perl modules, as described in Table 3-1. If you install OTRS from source, you will have to install these modules manually. This can be done either with the package manager of your Linux distribution (yast, apt-get) or, as described in this section, through the Perl shell and CPAN. If you're using ActiveState Perl, for instance on Windows, you could use PPM, the built-in Perl Package Manager. We recommend using your package manager if possible.
| Name | Description |
|---|---|
| DBI | Establishes a connection to the database back-end. |
| DBD::mysql | Contains special functions to connect to the MySQL database back-end (only required if MySQL is used). |
| DBD::pg | Contains special functions to connect to the PostgreSQL database back-end (only required if PostgreSQL is used). |
| Digest::MD5 | Allows the use of the md5 algorithm. |
| CSS::Minifier | Minifies a CSS file and writes the outpout directly to another file. |
| Crypt::PasswdMD5 | Provides interoperable MD5-based crypt functions. |
| MIME::Base64 | Encodes / decodes base64 strings, e.g. for mail attachments. |
| JavaScript:Minifier | Minifies a JavaScript file and writes the outpout directly to another file. |
| Net::DNS | Perl interface to the domain name system. |
| LWP::UserAgent | Processes HTTP requests. |
| Net::LDAP | Perl interface to a LDAP directory (only required a LDAP back-end is used). |
| GD | Interface to the GD graphics library (only required if the OTRS stats module is used). |
| GD::Text, GD::Graph, GD::Graph::lines, GD::Text::Align | Some more text- and graphic tools for the GD graphics library (only required if the OTRS stats module is used). |
| PDF::API2, Compress::Zlib | Needed to generate the PDF output for reports, search results and for the ticket print view. |
You can verify which modules you need to install with otrs.CheckModules.pl. This script is located in the bin directory, in the home directory of the 'otrs' user (see Script 3.7 below).
Please note that some modules are optional.
linux:~# cd /opt/otrs/bin/
linux:/opt/otrs/bin# ./otrs.CheckModules.pl
   o CGI............................ok (v3.49)
   o Crypt::PasswdMD5...............ok (v1.3)
   o CSS::Minifier..................ok (v0.01)
   o Date::Format...................ok (v2.24)
   o Date::Pcalc....................ok (v1.2)
   o DBI............................ok (v1.609)
   o DBD::mysql.....................ok (v4.013)
   o Digest::MD5....................ok (v2.36_01)
   o Encode::HanExtra...............ok (v0.23)
   o GD.............................ok (v2.44)
      o GD::Text....................ok (v0.86)
      o GD::Graph...................ok (v1.44)
      o GD::Graph::lines............ok (v1.15)
      o GD::Text::Align.............ok (v1.18)
   o IO::Scalar.....................ok (v2.110)
   o IO::Wrap.......................ok (v2.110)
   o JavaScript::Minifier...........ok (v1.05)
   o JSON...........................ok (v2.21)
      o JSON::PP....................ok (v2.27003)
      o JSON::XS....................Not installed! (Optional - Install it for faster AJAX/JavaScript handling.)
   o LWP::UserAgent.................ok (v5.829)
   o Mail::Internet.................ok (v2.06)
   o Mail::POP3Client...............ok (v2.18 )
      o IO::Socket::SSL.............ok (v1.31)
   o MIME::Base64...................ok (v3.07_01)
   o MIME::Tools....................ok (v5.428)
   o Net::DNS.......................ok (v0.65)
   o Net::POP3......................ok (v2.29)
   o Net::IMAP::Simple..............ok (v1.1916)
      o Net::IMAP::Simple::SSL......ok (v1.3)
   o Net::SMTP......................ok (v2.31)
      o Authen::SASL................ok (v2.15)
      o Net::SMTP::SSL..............ok (v1.01)
   o Net::LDAP......................ok (v0.4001)
   o PDF::API2......................ok (v0.73)
      o Compress::Zlib..............ok (v2.008)
   o SOAP::Lite.....................ok (v0.712)
   o Text::CSV......................ok (v1.18)
      o Text::CSV_PP................ok (v1.26)
      o Text::CSV_XS................Not installed! (Optional - Optional, install it for faster CSV handling.)
   o XML::Parser....................ok (v2.36)
linux:/opt/otrs/bin#
|
| Script 3.7. Checking needed modules. |
You should strive to install the missing modules from your Linux distribution's package management system. In that way, the packages will be automatically updated when new versions are available or when security issues are found. Please refer to your distribution's documentation on how to install additional packages. If the (correct version of) the module is not available from the package repositories, you can also install from CPAN, the Comprehensive Perl Archive Network.
To install one of the modules from above via CPAN, you have to execute the command perl -e shell -MCPAN. The Perl shell will be started in interactive mode and the CPAN module will be loaded. If CPAN is already configured, you can install the modules with the command install followed by the name of the module. CPAN takes care of the dependencies of a module to other Perl modules and will let you know if other modules are needed.
Execute also the two commands perl -cw bin/cgi-bin/index.pl and perl -cw bin/otrs.PostMaster.pl after changing into the directory /opt/otrs. If the output of both commands is "syntax OK", your Perl is properly set up (see Script 3.8 below).
linux:~# cd /opt/otrs linux:/opt/otrs# perl -cw bin/cgi-bin/index.pl cgi-bin/installer.pl syntax OK linux:/opt/otrs# perl -cw bin/otrs.PostMaster.pl otrs.PostMaster.pl syntax OK linux:/opt/otrs# |
| Script 3.8. Checking syntax |
Configuring the Apache web server
This section describes the basic configuration of the Apache web server with mod_cgi for OTRS. The web server should be able to execute CGI scripts. OTRS won't work if the Perl scripts cannot be parsed. Check the configuration files of your web server, and search for the line that loads the CGI module. If you see something like the following, the CGI module should already be in use.
LoadModule cgi_module /usr/lib/apache2/modules/mod_cgi.so
To access the web interface of OTRS conveniently via a short address, Alias and ScriptAlias entries are needed. Most Apache installations have a conf.d directory included. On Linux systems you can find this directory very often under /etc/apache or /etc/apache2. Log in as root, change to the conf.d directory and copy the appropriate template in /opt/otrs/scripts/apache2-httpd.include.conf to a file called otrs.conf in the Apache configuration directory.
Restart your web server to load the new configuration settings. On most systems you can start/restart your web server with the command /etc/init.d/apache2 restart (see Script 3.11 below).
linux:/etc/apache2/conf.d# /etc/init.d/apache2 restart Forcing reload of web server: Apache2. linux:/etc/apache2/conf.d# |
| Script 3.11. Restarting the web server. |
Now your web server should be configured for OTRS.
If you choose to increase performance and you can install mod_perl, then you can leave mod_cgi off, and configure the Apache web server for use with mod_perl, in the following manner:
Please ensure that mod_perl is installed and loaded, in order to take advantage of this feature. Due to the nature of the start-up script, your server will not fail to start if mod_perl is not properly loaded or compiled in your apache web server, unless mod_cgi is also on. Technically speaking you can leave mod_cgi on as well, but you should not.
Search your /etc/apache* directory for mod_perl.so (see Script 3.12 below) to see if the module is already loaded.
#:/ grep -Rn mod_perl.so /etc/apache* |
| Script 3.12. Searching for mod_perl. |
When you use the appropriate start script listed above and the module is loaded, the script (when commented in) /opt/otrs/scripts/apache2-perl-startup.pl can be used to load the perl modules into memory one time, saving on load times and increasing performance.
Configuring the database
The simple way - Using the web installer (works only with MySQL)
If you use MySQL as the database back-end, you can use the OTRS web installer:
http://localhost/otrs/installer.pl
When the web installer starts, please follow the next steps to setup your system:
-
Check out the information about the OTRS offices and click on next to continue (see Figure 3.1 below).
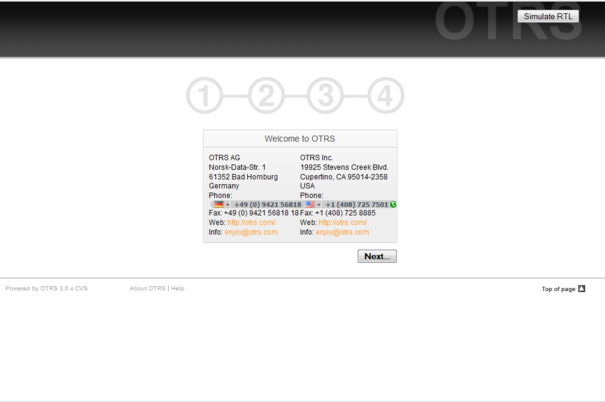 Figure 3.1. Welcome screen.
-
Read the GNU Affero General Public License (see Figure 3.2 below) and accept it, by clicking the corresponding button at the bottom of the page.
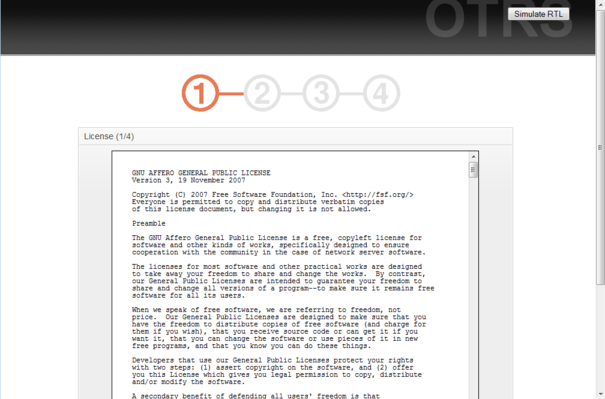 Figure 3.2. GNU Affero General Public License.
-
Provide the username and password of the administrator, the DNS name of the computer which hosts OTRS and the type of database system to be used. After that, check the settings (see Figure 3.3 below).
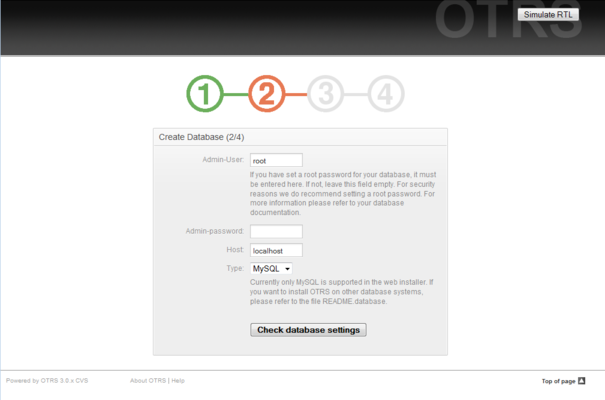 Figure 3.3. Database initial settings.
If the checking was successful, you will get a notification. Press OK to continue (see Figure 3.4 below).
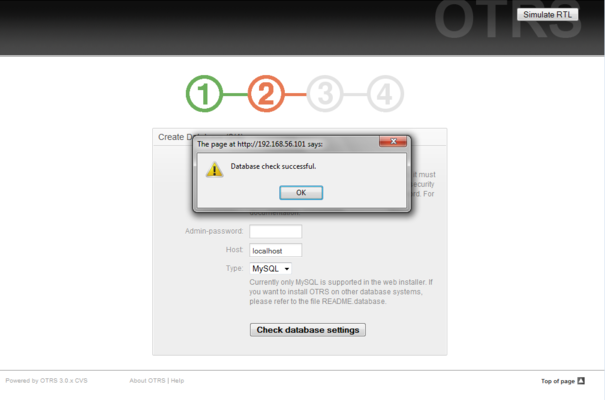 Figure 3.4. Successful checking notification.
-
Create a new database user, choose a name for the database and click on next (see Figure 3.5 below).

It is never a good idea to use default passwords. Please change the default password for the OTRS database!
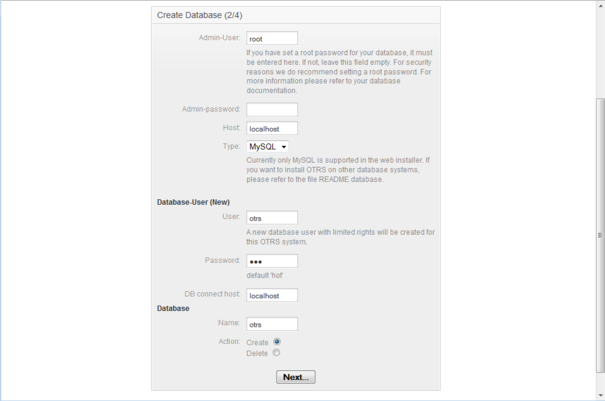 Figure 3.5. Database settings.
If the database and its user were successfully created, you will get a setup notification, as shown in the Figure 3.6. Click next to go to the next screen.
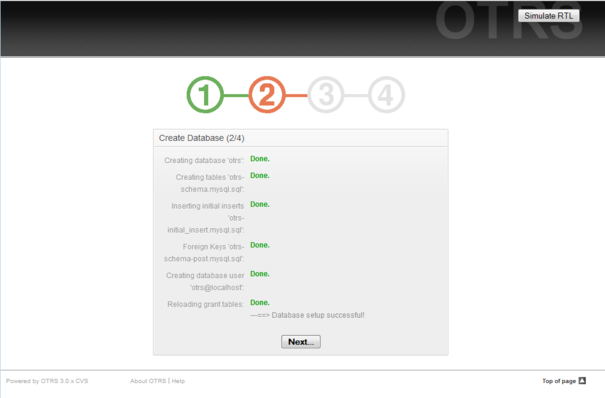 Figure 3.6. Successfully database setup notification.
-
Provide all the required system settings and click next (see Figure 3.7 below).
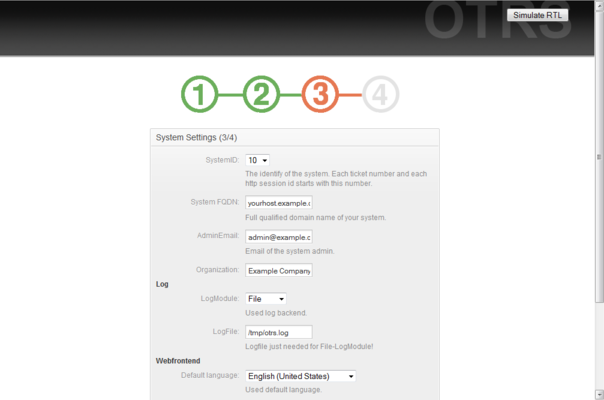 Figure 3.7. System settings.
-
If you want, you can provide the needed data to configure your inbound and outbound mail or skip this step by pressing the right button at the bottom of the screen (see Figure 3.8 below).
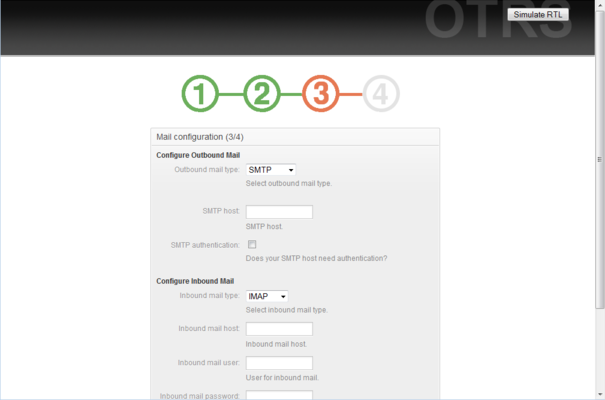 Figure 3.8. Mail configuration.
-
Restart the OTRS service now, to use the new configuration settings shown in the Script 3.13.
linux:~ # rcotrs restart-force
Shutting down OTRS
 Disable /opt/otrs/bin/otrs.PostMaster.pl ... done.
no crontab for otrs
 Shutting down cronjobs ... failed!
Shutting down OTRS (completely)
 Shutting down Apache ... done.
 Shutting down MySQL ... done.
                                                                     done
Starting OTRS (completely)
 Starting Apache ... done.
 Starting MySQL ... done.
Starting OTRS
 Checking Apache ... done.
 Checking MySQL ... done.
 Checking database connect... (It looks Ok!).
 Enable /opt/otrs/bin/otrs.PostMaster.pl ... done.
 Checking otrs spool dir...  done.
 Creating cronjobs (source /opt/otrs/var/cron/*) ... done.

  -->> http://linux.example.com/otrs/index.pl <<--
                                                                     done
                                                                     done
linux:~ #
Script 3.13. Restarting the OTRS service. -
Congratulations! Now the installation of OTRS is finished and you should be able to work with the system (see Figure 3.9 below). To log into the web interface of OTRS, use the address http://localhost/otrs/index.pl in your web browser. Log in as OTRS administrator, using the username root@localhost and the password root. After that you can configure the system for your needs.
Please change the password for the root@localhost account as soon as possible. 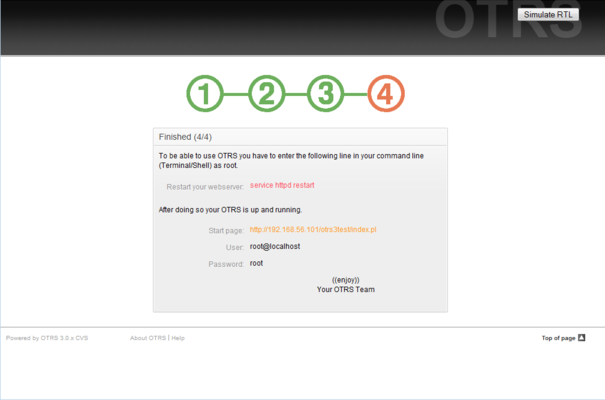 Figure 3.9. Final steps to install OTRS.


Installing the OTRS database manually
If you can't use the web installer to setup the OTRS database, you have to set it up manually. Scripts with the SQL statements to create and configure the database are located in scripts/database, in the home directory of the OTRS user (see Script 3.14 below).
linux:~# cd /opt/otrs/scripts/database/ linux:/opt/otrs/scripts/database# ls otrs-initial_insert.db2.sql otrs-schema.mysql.sql otrs-schema.oracle.sql otrs-initial_insert.mssql.sql otrs-schema-post.db2.sql otrs-initial_insert.mysql.sql otrs-schema.postgresql.sql otrs-initial_insert.oracle.sql otrs-initial_insert.postgresql.sql otrs-schema-post.mssql.sql otrs-initial_insert.xml otrs-schema-post.mysql.sql otrs-schema.db2.sql otrs-schema-post.oracle.sql otrs-schema-post.postgresql.sql otrs-schema.mssql.sql otrs-schema.xml linux:/opt/otrs/scripts/database# |
| Script 3.14. Files needed to create and configure the database. |
To setup the database for the different database back-ends the .sql files must be processed in a special order.
Create the OTRS database manually step by step
- Creating the DB: Create the database, that you want to use for OTRS, with your database client or your database interface.
- Creating the tables: With the otrs-schema.DatabaseType.sql files (e.g.. otrs-schema.oracle.sql, otrs-schema.postgresql.sql) you can create the tables in your OTRS database.
- Inserting the initial system data: OTRS needs some initial system data to work properly (e.g. the different ticket states, ticket and notification types). Depending on the type of your database Use one of the files otrs-initial_insert.mysql.sql, otrs-initial_insert.db2.sql, otrs-initial_insert.oracle.sql, otrs-initial_insert.postgresql.sql or otrs-initial_insert.mssql.sql .
- Creating references between tables: The last step is to create the references between the different tables in the OTRS database. Use the otrs-schema-post.DatabaseType.sql file to create these (e.g. otrs-schema-oracle.post.sql, otrs-schema-post.postgresql.sql).
After you have finished the database setup you should check and set proper access rights for the OTRS database. It should be enough to grant access to one user. Depending on the database server you are using, setting up the access rights differs, but it should be possible either with your database client or your graphical database front-end.
If your database and the access rights are configured properly, you have to tell OTRS which database back-end you want to use and how the ticket system can connect to the database. Open the file Kernel/Config.pm located in the home directory of the OTRS user and change the parameters shown in the Script 3.15 to your needs.
    # DatabaseHost
    # (The database host.)
    $Self->{'DatabaseHost'} = 'localhost';

    # Database
    # (The database name.)
    $Self->{Database} = 'otrs';

    # DatabaseUser
    # (The database user.)
    $Self->{DatabaseUser} = 'otrs';

    # DatabasePw
    # (The password of database user.)
    $Self->{DatabasePw} = 'some-pass';
|
| Script 3.15. Parameters to be customized. |
Setting up the cron jobs for OTRS
OTRS needs some cron jobs to work properly. The cron jobs should be run with the same user rights that were specified for the OTRS modules. That means that the cron jobs must be inserted into the crontab file of the OTRS user.
All scripts with the cron jobs are located in var/cron, in the home directory of the OTRS user (see Script 3.16 below).
linux:~# cd /opt/otrs/var/cron linux:/opt/otrs/var/cron# ls aaa_base.dist generic_agent.dist rebuild_ticket_index.dist cache.dist pending_jobs.dist session.dist fetchmail.dist postmaster.dist unlock.dist generic_agent-database.dist postmaster_mailbox.dist linux:/opt/otrs/var/cron# |
| Script 3.16. Files needed to create the cron jobs. |
All scripts are ending in .dist. You should copy them to files with no ending. If you are using bash, you might want to use the command listed in Script 3.17 below.
linux:/opt/otrs/var/cron# for foo in *.dist; do cp $foo `basename $foo .dist`; done linux:/opt/otrs/var/cron# ls aaa_base generic_agent-database.dist rebuild_ticket_index aaa_base.dist generic_agent.dist rebuild_ticket_index.dist cache pending_jobs session cache.dist pending_jobs.dist session.dist fetchmail postmaster unlock fetchmail.dist postmaster.dist unlock.dist generic_agent postmaster_mailbox generic_agent-database postmaster_mailbox.dist linux:/opt/otrs/var/cron# |
| Script 3.17. Copying and renaming all the files needed to create the cron jobs. |
Table 3-2 describes the different cron jobs and what they do.
| Script | Function |
|---|---|
| aaa_base | Sets the basics for the crontab of the OTRS user. |
| cache | Removes expired cache entries from disk. Clears the loader cache for CSS and JavaScript files. |
| fetchmail | Used only if new mails will be fetched with fetchmail into the ticket system. |
| generic_agent | Executes the jobs of the GenericAgent that are not stored in the database but in own config files. |
| generic_agent-database | Executes the jobs of the GenericAgent that are stored in the database. |
| pending_jobs | Checks in the system for pending tickets, and closes them or sends reminders if needed. |
| postmaster | Checks the message queue of the ticket system and delivers messages that are still in the queues. |
| postmaster_mailbox | Fetches the mails from the POP3 accounts that were specified in the admin area, in the section for "PostMaster Mail Accounts". |
| rebuild_ticket_index | Rebuilds the ticket index, which improves the speed of the QueueView. |
| session | Removes old and no longer needed session ID's. |
| unlock | Unlocks tickets in the system. |
To setup all cron jobs the script bin/Cron.sh can be used, which is located in the home directory of the OTRS user. When this script is executed, it needs a parameter to tell if you want to install, remove or reinstall the cron jobs. The following parameters can be used:
Cron.sh { start } { stop } { restart } [ OTRS user ]
Because the cron jobs need to be installed in the crontab file of the OTRS user, you need to be logged in as OTRS user. If you are logged in as root, you can change to the OTRS user with the command su otrs. Execute the commands specified in the Script 3.18 below to install the cron jobs.
|
|
Please note that other crontab entries of the OTRS user will be overwritten or removed by the Cron.sh script. Please change the Cron.sh script to keep also other crontab entries if needed. |
linux:/opt/otrs/var/cron# cd /opt/otrs/bin/ linux:/opt/otrs/bin# su otrs linux:~/bin$ ./Cron.sh start /opt/otrs/bin Cron.sh - start/stop OTRS cronjobs Copyright (C) 2001-2009 OTRS AG, http://otrs.org/ (using /opt/otrs) done linux:~/bin$ exit exit linux:/opt/otrs/bin# |
| Script 3.18. Installing the cron jobs. |
The command crontab -l -u otrs, which can be executed as root, shows you the crontab file of the OTRS user and you can check if all entries are right (see Script 3.19 below).
linux:/opt/otrs/bin# crontab -l -u otrs # -- # cron/aaa_base - base crontab package # Copyright (C) 2001-2011 OTRS AG, http://otrs.org/ # -- # This software comes with ABSOLUTELY NO WARRANTY. # -- # Who gets the cron emails? MAILTO="root@localhost" # -- # cron/cache - delete expired cache # Copyright (C) 2001-2011 OTRS AG, http://otrs.org/ # This software comes with ABSOLUTELY NO WARRANTY. # -- # delete expired cache weekly (Sunday mornings) 20 0 * * 0 $HOME/bin/otrs.CacheDelete.pl --expired >> /dev/null 30 0 * * 0 $HOME/bin/otrs.LoaderCache.pl -o delete >> /dev/null # -- # cron/fetchmail - fetchmail cron of the OTRS # Copyright (C) 2001-2011 OTRS AG, http://otrs.org/ # -- # This software comes with ABSOLUTELY NO WARRANTY. # -- # fetch every 5 minutes emails via fetchmail #*/5 * * * * /usr/bin/fetchmail -a >> /dev/null # -- # cron/generic_agent - otrs.GenericAgent.pl cron of the OTRS # Copyright (C) 2001-2011 OTRS AG, http://otrs.org/ # -- # -- # This software comes with ABSOLUTELY NO WARRANTY. # -- # start generic agent every 20 minutes */20 * * * * $HOME/bin/GenericAgent.pl >> /dev/null # example to execute GenericAgent.pl on 23:00 with # Kernel::Config::GenericAgentMove job file #0 23 * * * $HOME/bin/otrs.GenericAgent.pl -c "Kernel::Config::GenericAgentMove" >> /dev/null # -- # cron/generic_agent - GenericAgent.pl cron of the OTRS # Copyright (C) 2001-2011 OTRS AG, http://otrs.org/ # -- # This software comes with ABSOLUTELY NO WARRANTY. # -- # start generic agent every 10 minutes */10 * * * * $HOME/bin/otrs.GenericAgent.pl -c db >> /dev/null # -- # cron/pending_jobs - pending_jobs cron of the OTRS # Copyright (C) 2001-2011 OTRS AG, http://otrs.org/ # -- # This software comes with ABSOLUTELY NO WARRANTY. # -- # check every 120 min the pending jobs 45 */2 * * * $HOME/bin/otrs.PendingJobs.pl >> /dev/null # -- # cron/postmaster - postmaster cron of the OTRS # Copyright (C) 2001-2011 OTRS AG, http://otrs.org/ # -- # This software comes with ABSOLUTELY NO WARRANTY. # -- # check daily the spool directory of OTRS #10 0 * * * * test -e /etc/init.d/otrs & /etc/init.d/otrs cleanup >> /dev/null; test -e /etc/rc.d/init.d/otrs && /etc/rc.d/init.d/otrs cleanup >> /dev/null 10 0 * * * $HOME/bin/otrs.CleanUp.pl >> /dev/null # -- # cron/postmaster_mailbox - postmaster_mailbox cron of the OTRS # Copyright (C) 2001-2011 OTRS AG, http://otrs.org/ # -- # This software comes with ABSOLUTELY NO WARRANTY. # -- # fetch emails every 10 minutes */10 * * * * $HOME/bin/otrs.PostMasterMailbox.pl >> /dev/null # -- # cron/rebuild_ticket_index - rebuild ticket index for OTRS # Copyright (C) 2001-2011 OTRS AG, http://otrs.org/ # -- # This software comes with ABSOLUTELY NO WARRANTY. # -- # just every day 01 01 * * * $HOME/bin/otrs.RebuildTicketIndex.pl >> /dev/null # -- # cron/session - delete old session ids of the OTRS # Copyright (C) 2001-2011 OTRS AG, http://otrs.org/ # -- # This software comes with ABSOLUTELY NO WARRANTY. # -- # delete every 120 minutes old/idle session ids 55 */2 * * * $HOME/bin/otrs.DeleteSessionIDs.pl --expired >> /dev/null # -- # cron/unlock - unlock old locked ticket of the OTRS # Copyright (C) 2001-2011 OTRS AG, http://otrs.org/ # -- # This software comes with ABSOLUTELY NO WARRANTY. # -- # unlock every hour old locked tickets 35 * * * * $HOME/bin/otrs.UnlockTickets.pl --timeout >> /dev/null linux:/opt/otrs/bin# |
| Script 3.19. Crontab file. |